Chapter 4: Animating with track envelopes
In this chapter I will show you how to animate visible items with track envelopes. For this tutorial I will use the project for the logo of this site (available in the demos section) and also I will not cover up every single thing I've done in it but just the basics to get you started with your own projects.As you can see in the screenshot below there are three tracks for the text strings, two tracks for the two gray rectangles and another two tracks for the Reaper logo.
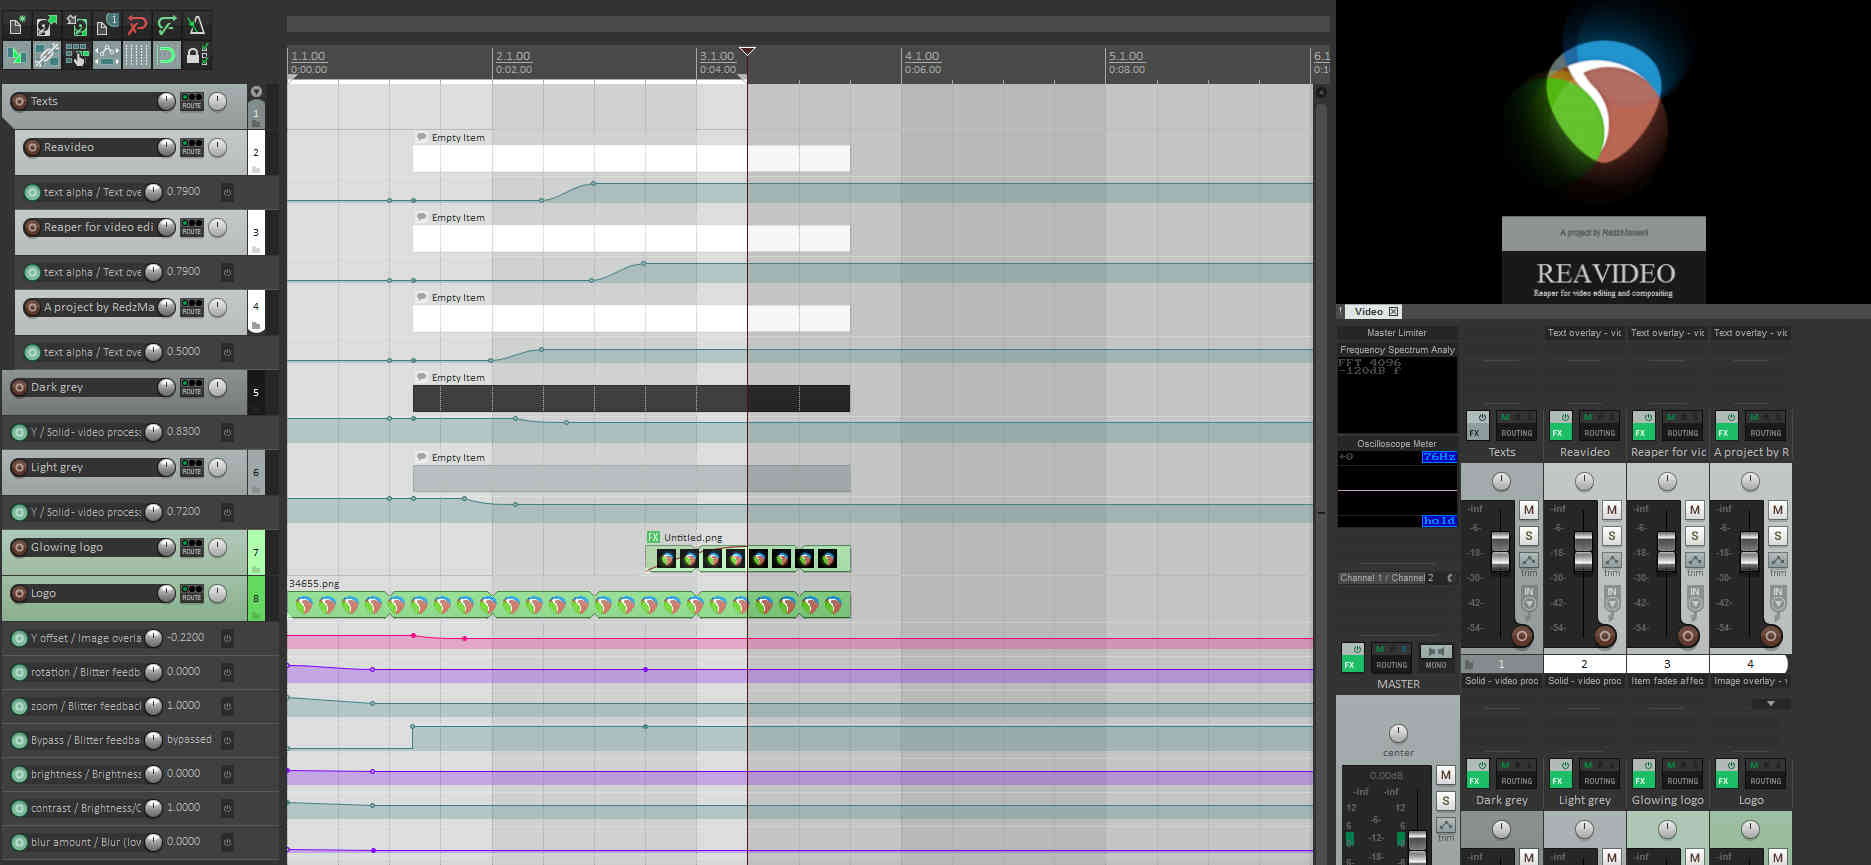
Starting with the text tracks, I put a default Text preset in each one with the desired string and after setting up the position and the size I've automated the text alpha parameter to make the text appear smoothly.
To add a track envelope for a parameter click on the track envelope button (the one with "trim" written on it), search for a section named after the preset you're using in the video processor (in this case Text) and click on the parameter name.
Now for animating the selected parameter insert two points on the envelope by shift (or ctrl to ignore the snapping function) clicking on it and set the first to zero (invisible text) and the second to an higher value (visible text, based on how high is the number).
To change the animation smoothness you can change the envelope shape between the two points you made by right clicking on the first one -> Set point shape and choosing the shape you want.
You can also modify the shape selected by alt dragging the envelope between the two points; this is really cool because it gives you more flexibility for achieving the animation that you desire.
For the two gray rectangles I used the same method but with the Y parameter instead. To make them I used an older version of the Rectangle preset (named Solid) but it should be no difference with a new version of it.
By the way, as you can see in the first image, like I said in chapter two, I put an empty item in the tracks with generated content; this is useful not only as a reminder that the track isn't empty but also to easily move the envelope points, if you need to, by just moving the empty item itself.
Regarding the logo initial animation I used my favourite preset: the mighty Bitter feedback. I've automated the rotation and the zoom parameters, leaving the envelope shape of the zoom parameter untouched. I also added a Brightness/Contrast preset and a Blur preset to achieve that sort of glow effect at the beginning.
When the intro ends I disable the Bitter feedback by automating the bypass value, so the logo can move (by automating the Y offset parameter of the Track opacity/zoom/pan) without leaving any trail generated by the preset.

a lot of gif "crust".