Chapter 2: Effects hierarchy and Text
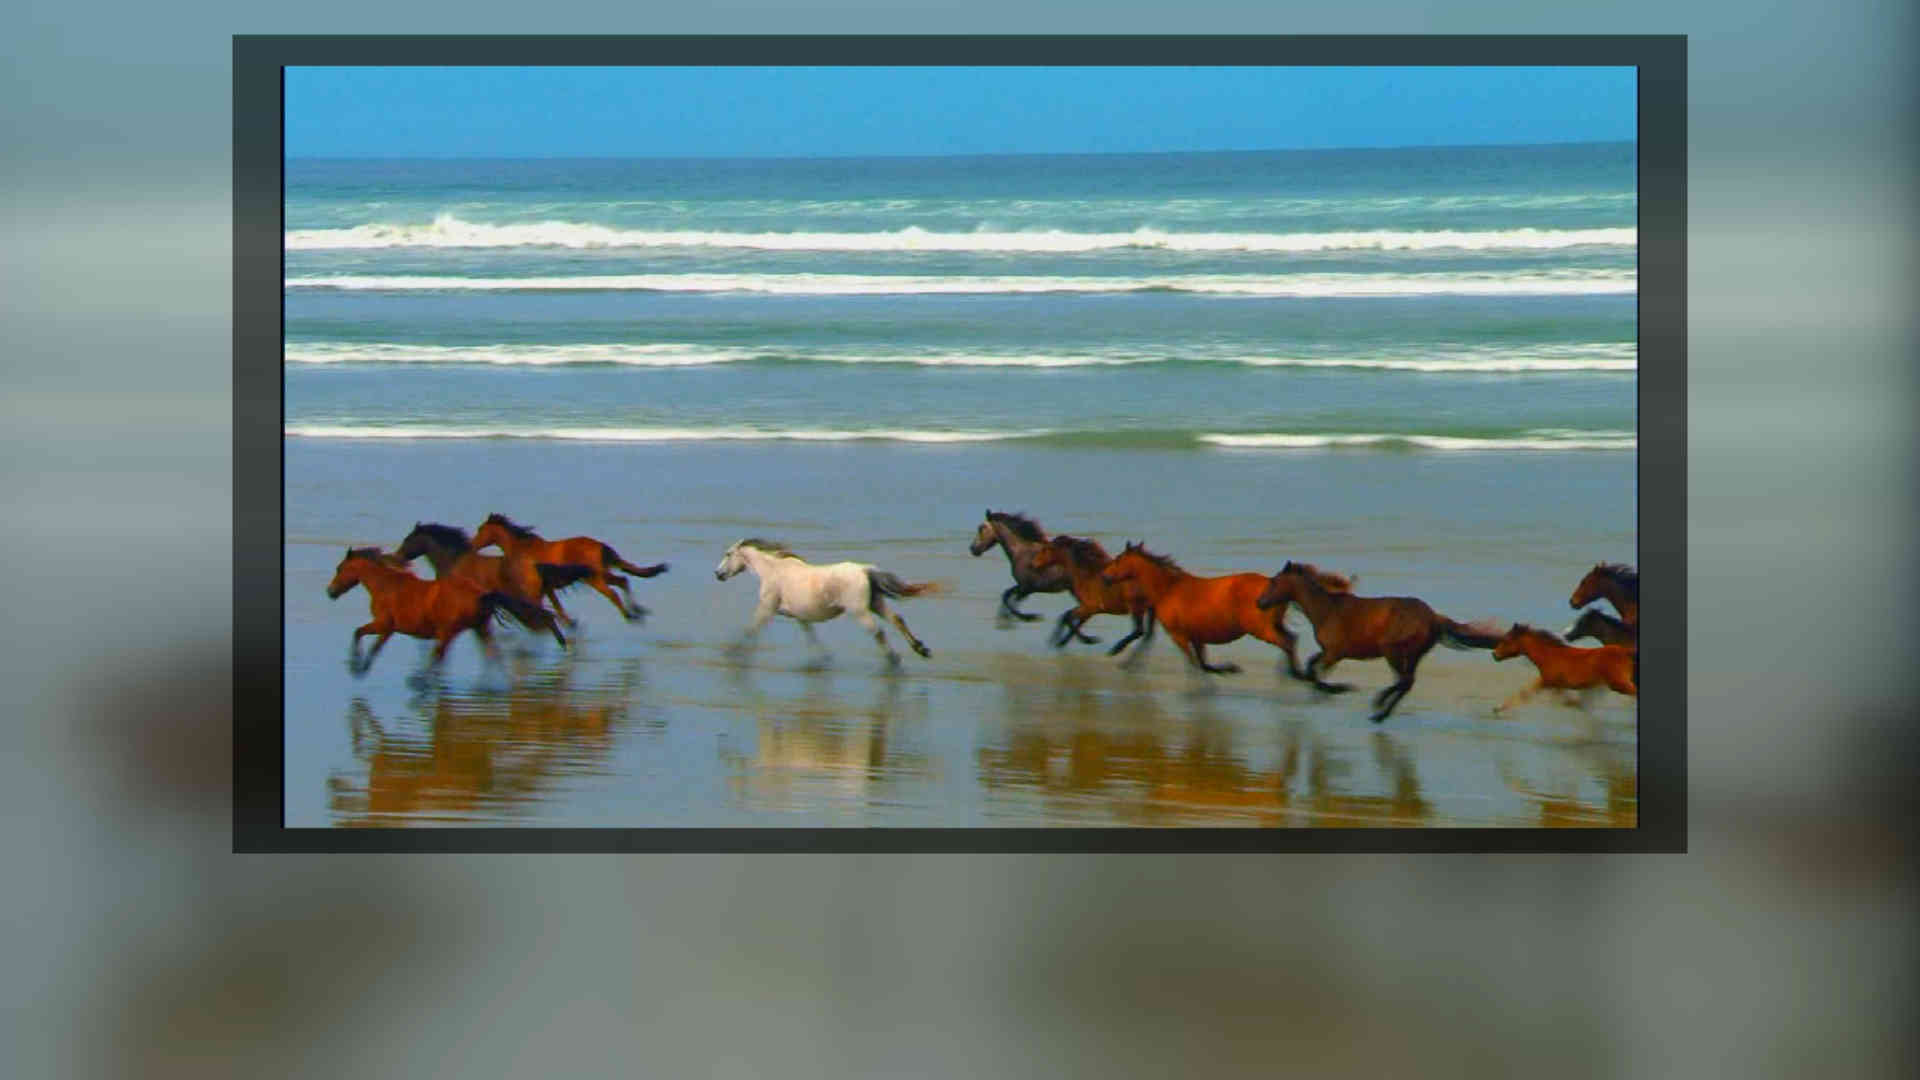
In this big chapter I will show you how to work with multiple tracks, or more precisely how the effects hierarchy works. What I'm going to create (showed in the picture) is composed of four elements: the video on top, its shadow, the blurred background and the text.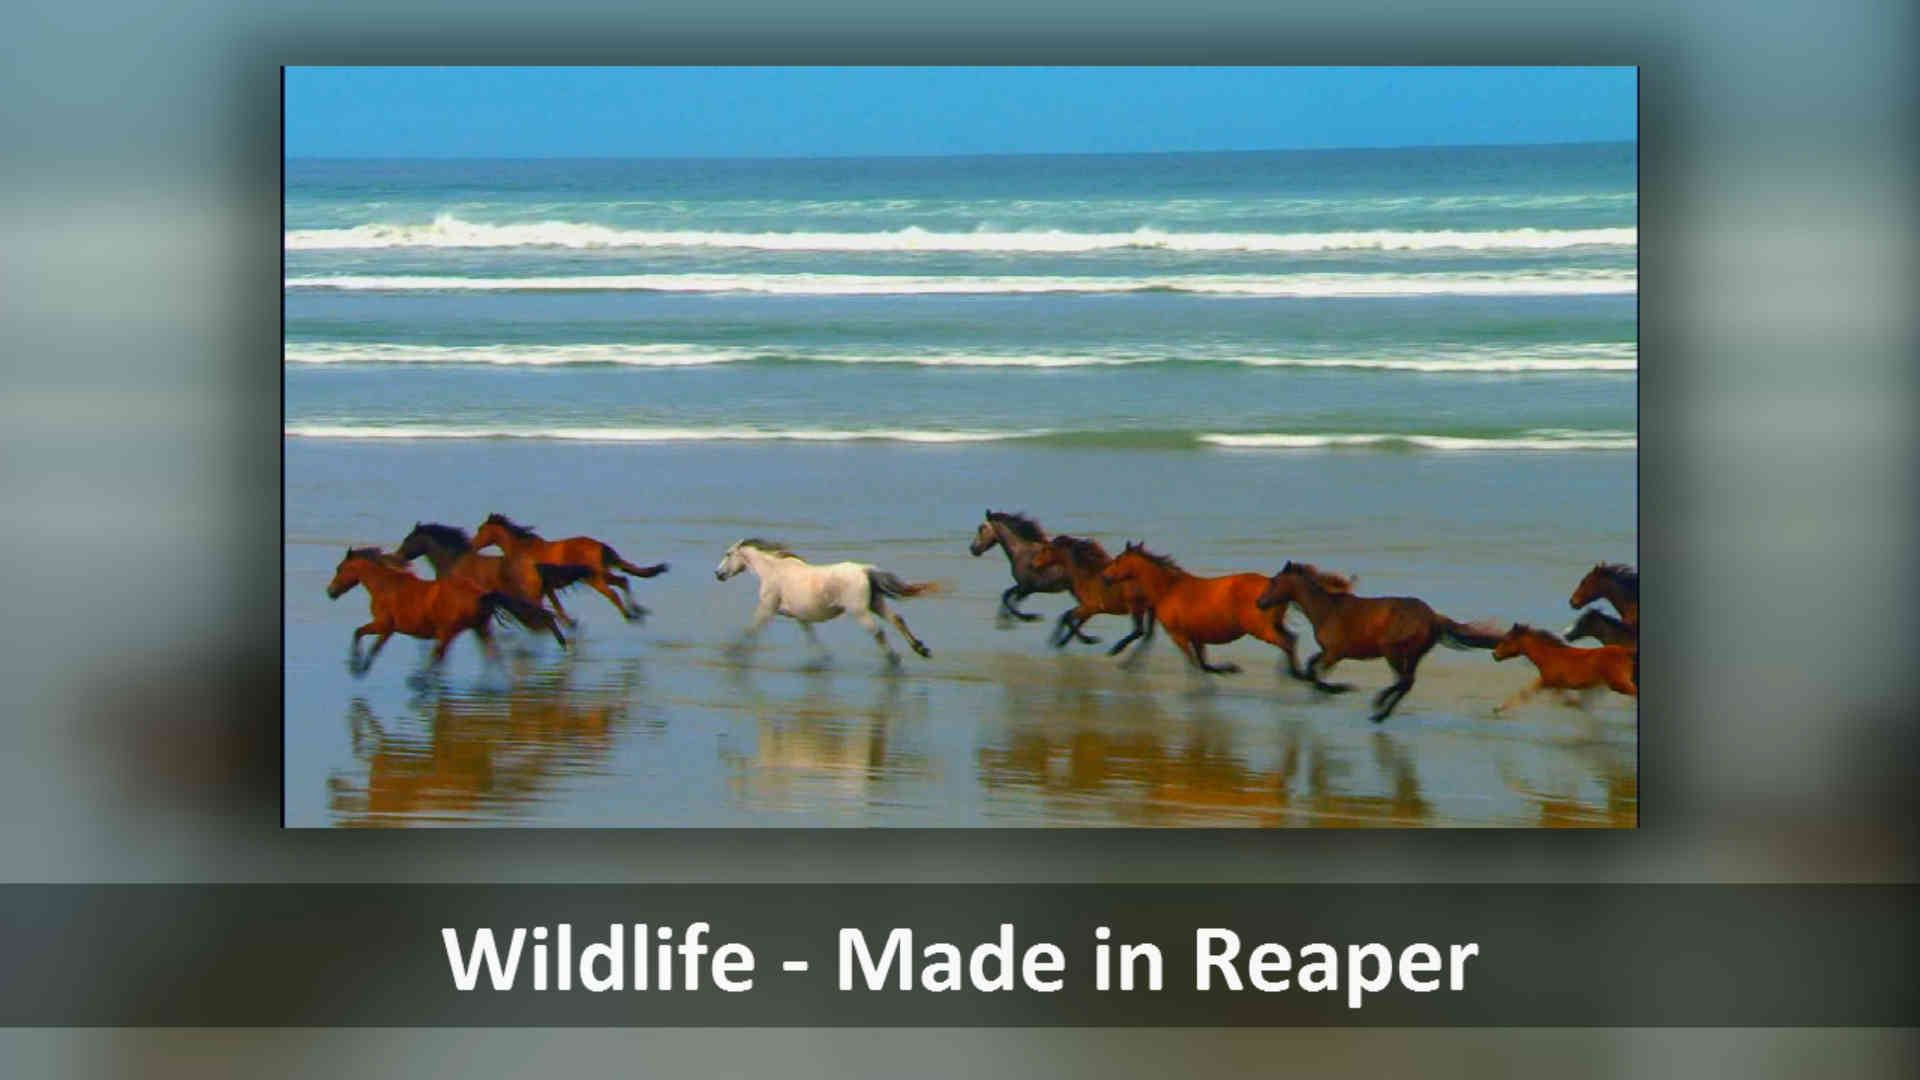
First thing add a new track, drag and drop a video clip on it, add a Video Processor to the track with the preset Track opacity/zoom/pan and modify the Y offset to move up the clip a little bit. Then on a second track add the same video without the video processor.
I want to stop for a moment; as you can see in the picture above there's a color difference between the video on top and the background, that's because I increased the saturation on the top one. To do so add another video processor on the first track, select the Brightness/Contrast preset and increase the saturation a little bit. But now, if you have noticed, the background video has its saturation increased too, that's because the new video processor you just added thinks that the second track is part of the first track. Let me explain more clearly.
When you use the Track opacity/zoom/pan for the first time the video clip and the video processors (if there are any) occupy the entire canvas of the first track, so when you resize the track the video clip, with all the effects applied on it, will be resized too. But now every new video processor after the Track opacity/zoom/pan will think that the resized first track, plus all the visible tracks below are part of the first track, so they will apply the effect on everything that is visible.
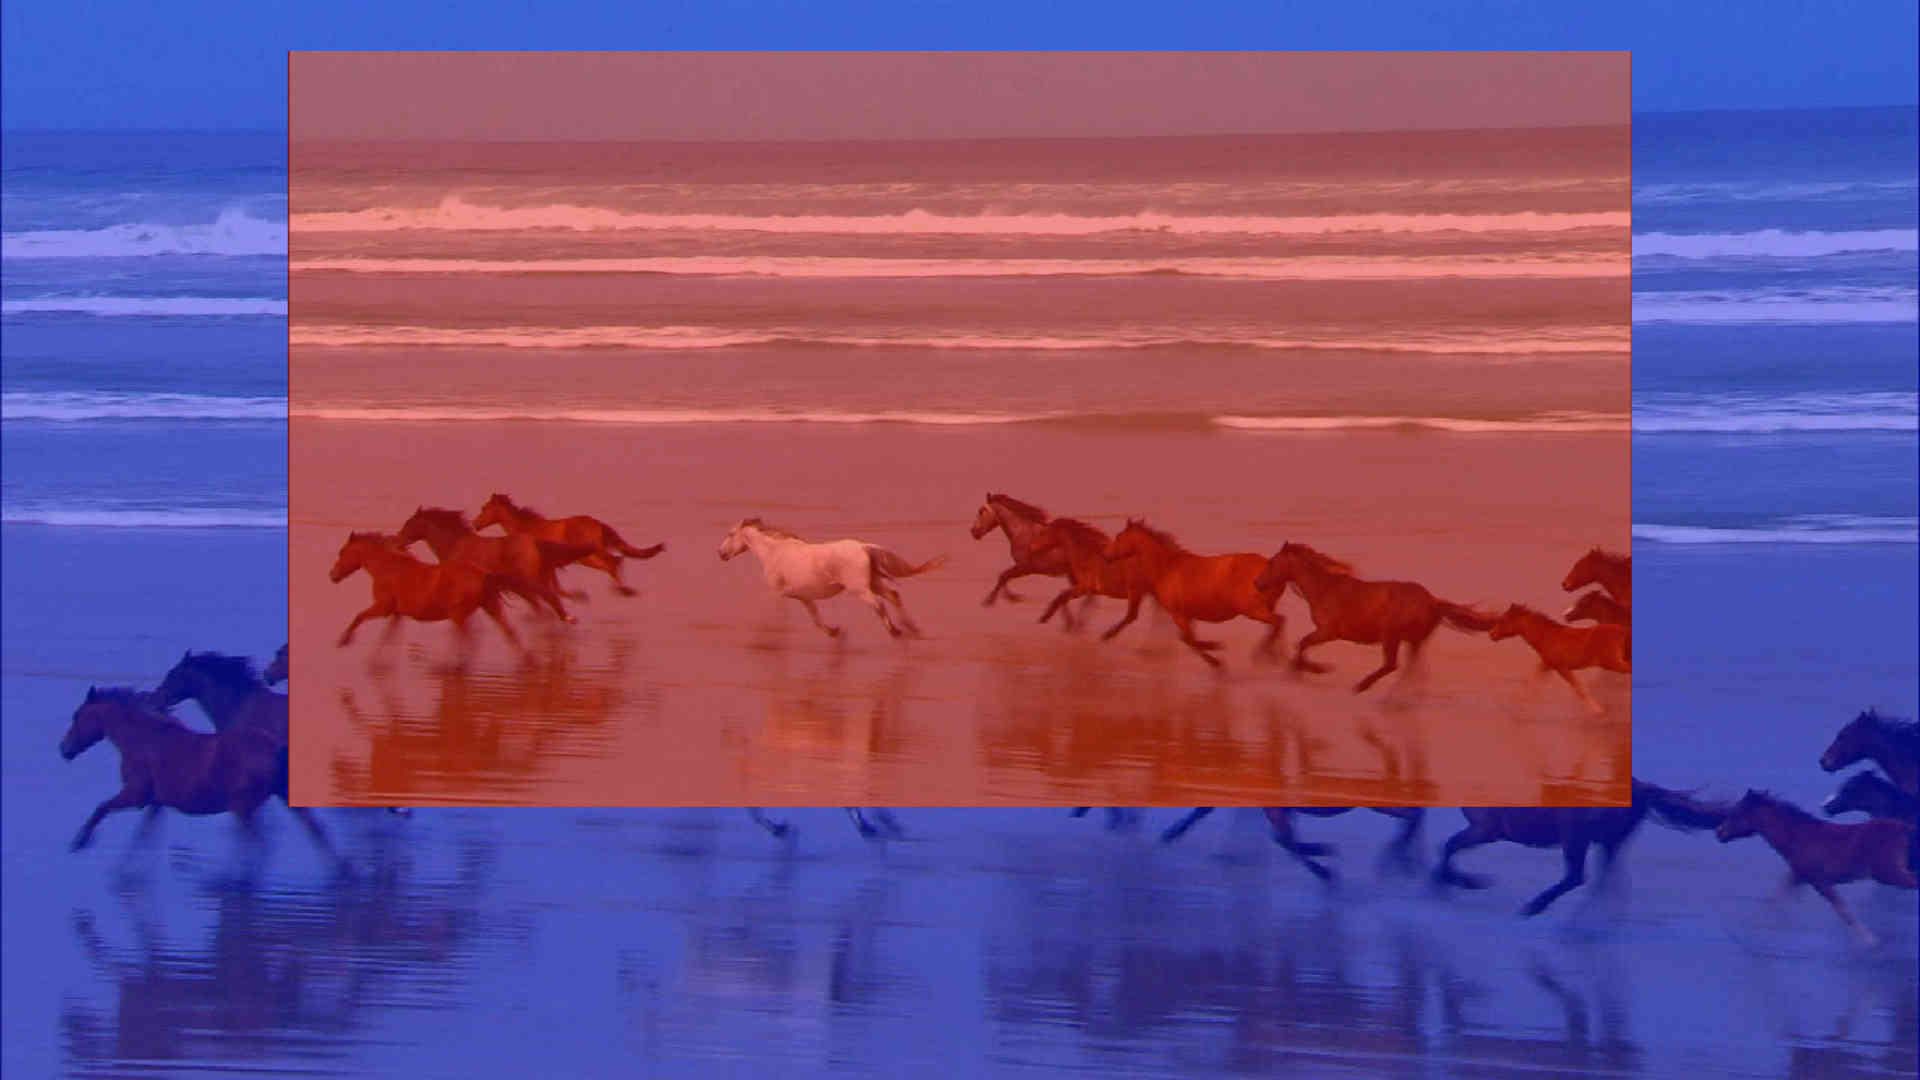
Left: how a video processor sees the first track before Track o/z/p
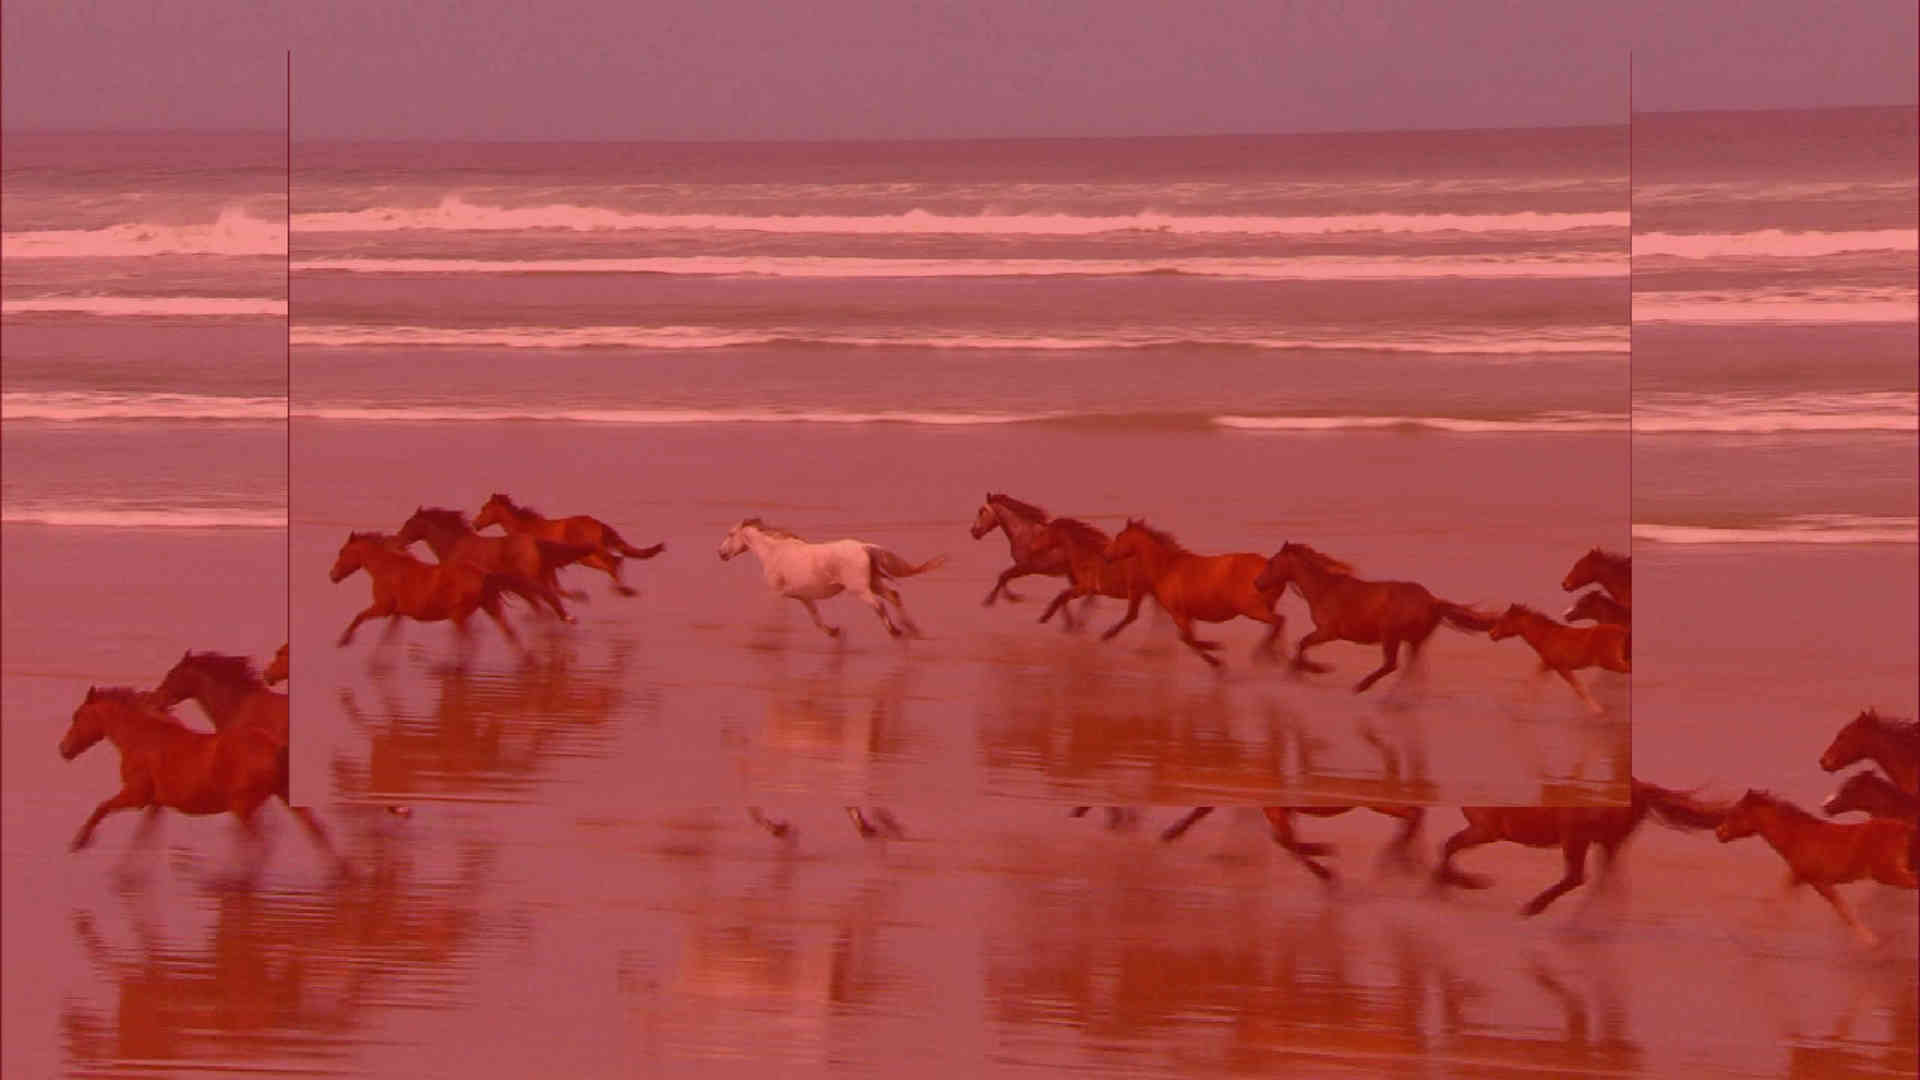
Right: how a video processor sees the first track after Track o/z/p
This is the most confusing behaviour of the video processor so don't worry if you do not get it immediately.
To work around this limitation you can do one of the two following things:
- Move the effect before the Track opacity/zoom/pan preset.
- Apply the effect on the clip; right click on the video clip -> Item properties -> Take FX and add the video processor in the new window.
In both cases the saturation effect will not be applied on the other tracks, I suggest you to just move the effect since it is a more easy and "clean" approach.
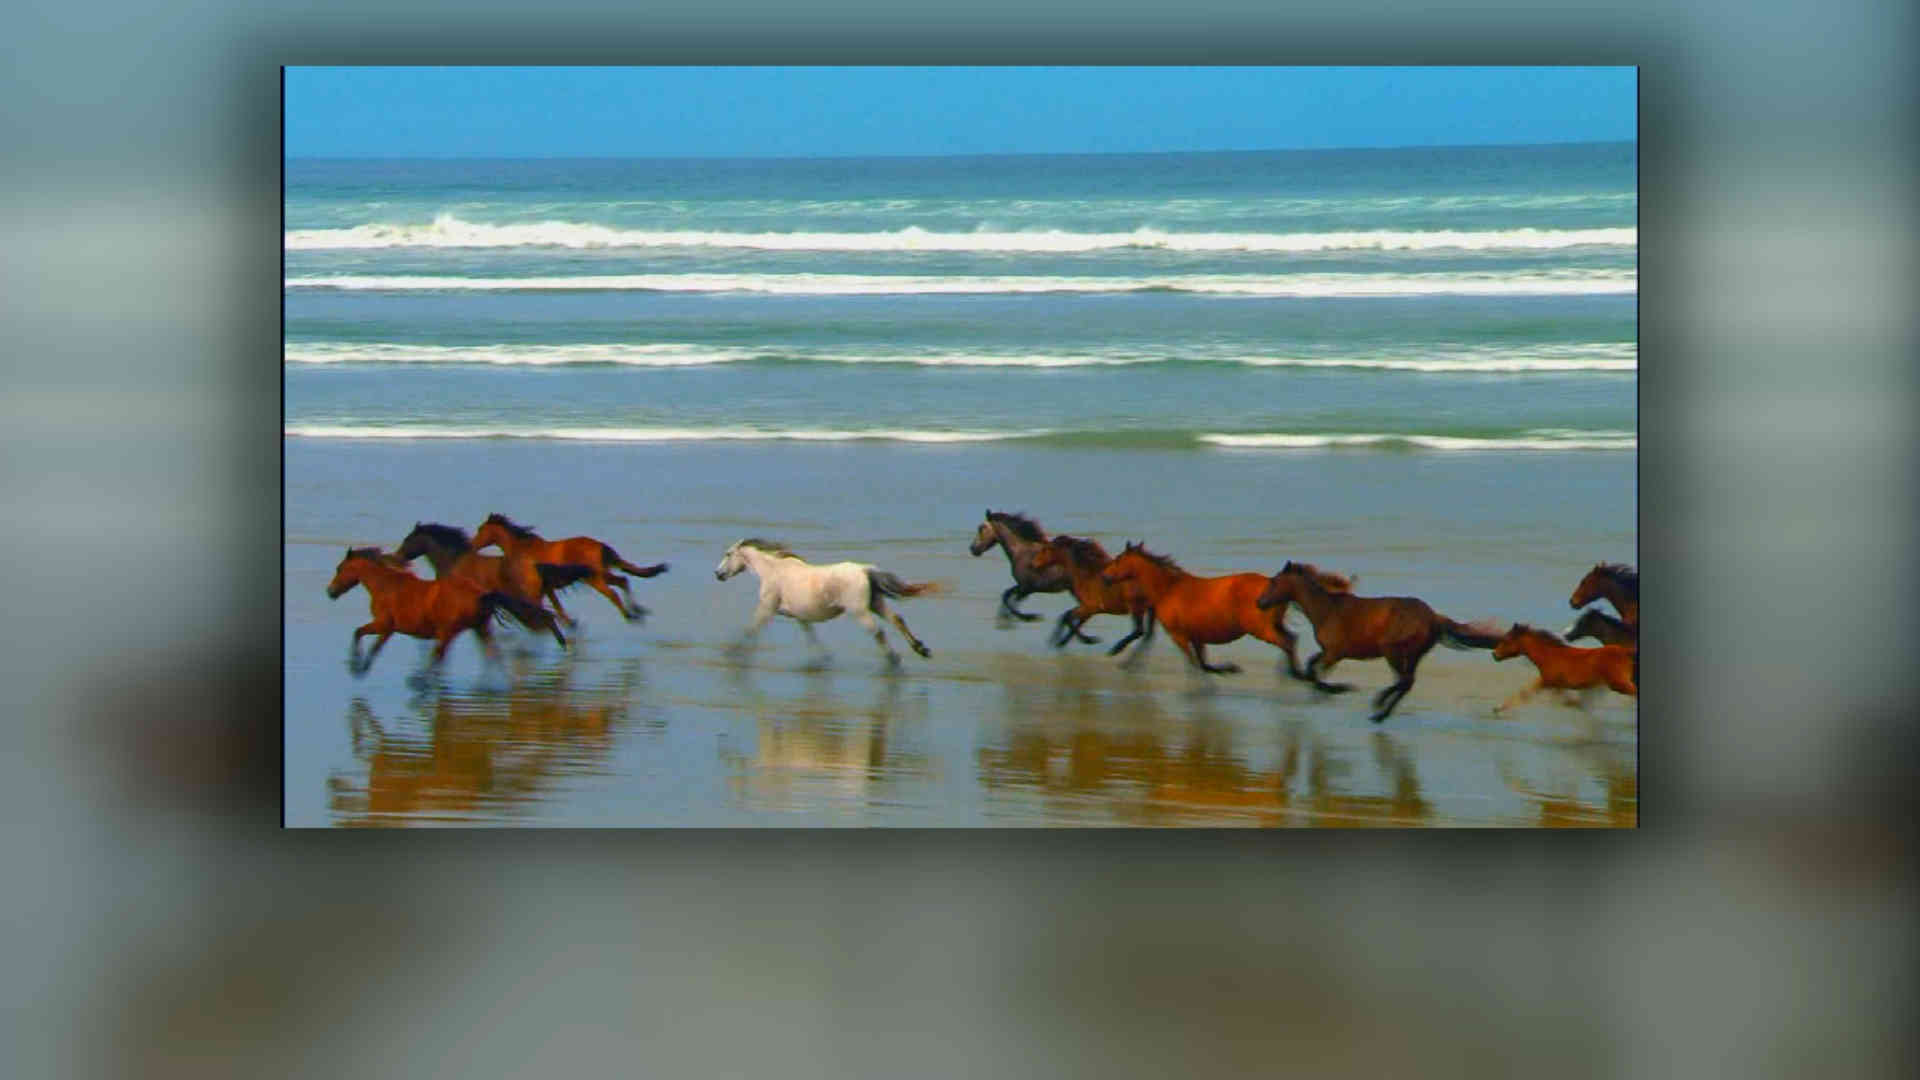
Now back to the background, add a new video processor with the preset Blur (low quality), modify the blur amount and add another saturation effect but this time decrease it a little.
Before adding the text I want to focus on the shadow because it's a little bit tricky to achieve without a preset (I will not use the Track opacity/zoom/pan+ preset for this tutorial).
Make a copy of the first track and put below it, increase the size a little, set the saturation to zero and decrease the brightness until the video becomes black. And remember to check the saturation preset's position or the entire background will become black! You should now have something like in the picture here.
The shadow is there but it's not that great; add a blur effect on its track to make it softer and modify its X/Y offset and size to achieve a good result.
Now maybe you didn't notice but when you applied the blur effect on the shadow it propagated to the background too, but in this case its a behaviour that you want to take advantage of since you want the shadow and the background blurred. So you can delete the blur effect from the background since the result will be more or less the same.
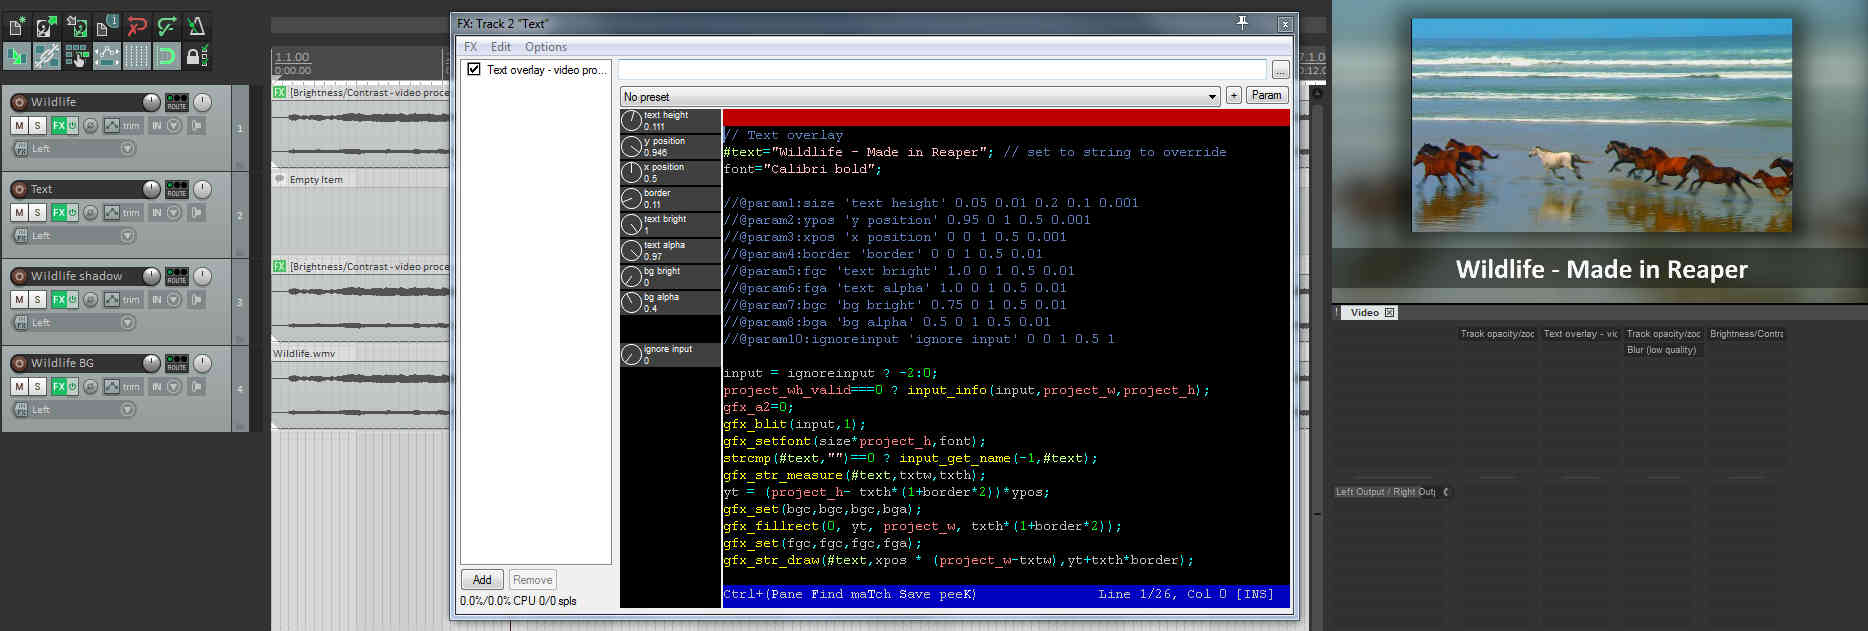
Finally you can add the text. Add a track with an empty item (Insert -> Empty item), a video processor and the preset Text (I will not use the Text+ preset for this tutorial). Adding an empty item will be useful when you will animate the text so do not think too much about it!
Before modifying any text attribute you must type your text in the code at line two after [#text="] and save the modified code by pressing CTRL+S. If you did this correctly the text should appear on the video window, if not check if you have deleted the last quote mark after you typed the text.
You can also change the font by typing its name at line three after [font="]. The effect uses the installed fonts in your system, on Windows you can use the Characters Map to search for a good one.
Now you can modify all the various knobs to achieve a good result, they are pretty self-explanatory so I won't cover them for the time being.
If you want you can download the project files of this tutorial from here.